Build Lush Gardens with Reclaimed Beds and Trellises

Today we dive into DIY garden beds and trellises built from reclaimed materials, celebrating resourcefulness, resilience, and the joy of growing more with less. Expect practical guidance, safety notes, and inspiring stories that turn scrap wood, panels, and found objects into sturdy structures that nurture vegetables, flowers, and community. By the end, you’ll know how to plan, source, build, and care for creations that save money, reduce waste, and look wonderfully unique in every season.

Hunting for Materials Responsibly

Look to curbside giveaways, salvage yards, construction offcuts, community boards, and friends clearing garages, but always ask permission and verify safety. Check for rot, hidden nails, and suspicious coatings before loading anything into your car. Choose food-safe materials, especially for structures that touch soil or edible plants. Favor boards that can be cleaned up with sanding, and hardware that still threads cleanly. Responsible sourcing means respecting neighbors, businesses, and the environment while rescuing quality pieces that deserve a second life.

Measuring Space and Sun Patterns

Observe how light moves across your yard during different seasons, and note wind corridors that could stress tall trellises. Measure walkways generous enough for wheelbarrows and comfortable turning. Design bed dimensions based on arm reach, avoiding overly wide spans that make harvesting difficult. Keep taller trellises on the north side so they do not shade shorter crops. Record nearby trees, roof lines, and fences that influence microclimates, and plan anchoring points where soil drains well after heavy rain.

Sketching Modular Designs

Create simple sketches using common reclaimed lengths to minimize cuts and waste. Consider repeatable modules that can grow with your garden, like a family of equal-length beds and A-frame trellises that share hardware. Plan for disassembly, allowing you to move components as beds expand or rotate. Modular thinking simplifies future repairs, since you can swap a damaged board without reinventing the entire layout. Keep notes about angles, fastener types, and joint methods so your system remains consistent over time.

Choose Safe, Durable Pieces That Age Gracefully

Safety comes first when reusing materials near food and soil. Some wood treatments, paints, and metal coatings are unsuitable for edible gardens, while others shine with longevity and low maintenance. Knowing what to embrace and what to avoid keeps your harvests healthy and your builds strong. Evaluate materials with a critical eye, select corrosion-resistant fasteners, and anticipate weather exposure. Thoughtful choices today mean fewer failures tomorrow and structures that develop a warm patina rather than dangerous surprises.

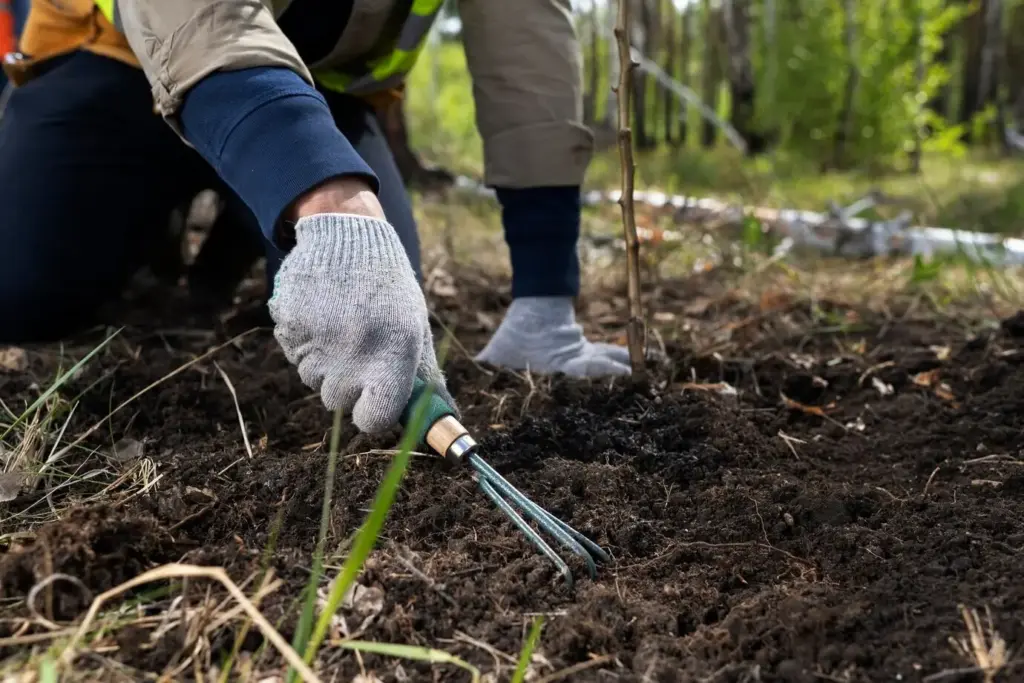
Step-by-Step: A Sturdy Raised Bed from Salvaged Boards

Transform a pile of weathered boards or pallet planks into a strong raised bed that looks intentional and lasts many seasons. Work deliberately, square your corners, and predrill holes to prevent splitting brittle wood. Anchor sleeves or stakes stabilize the sides, while hardware cloth under the bed deters burrowing pests. With patience and a tape measure, you can create professional results using everyday tools, thoughtful fasteners, and affordable finishes suited to outdoor exposure and edible gardening.

Selecting Pallets and Boards the Smart Way

Choose pallets marked HT rather than MB, and avoid anything with mystery stains or chemical residues. Pry planks slowly using a flat bar to preserve length, and pull nails from behind to reduce splintering. Keep your longest, straightest pieces for the sides, saving shorter or knotty boards for interior bracing. A quick anecdote: a neighbor bakery offered a neat stack of clean pallets after a friendly conversation, proving that polite questions often unlock excellent, food-safe materials where you least expect them.

Strong Corners, Solid Fasteners

Corners carry the load, so make them robust with overlapping joints, inner stakes, or reclaimed angle iron from an old bed frame. Predrill for screws and consider exterior-rated coated or stainless hardware to fight corrosion. L-brackets add rigidity without expensive tools. Keep everything square as you assemble, measuring diagonals until they match. If boards are warped, clamp them into alignment before fastening. Thoughtful corner construction prevents bulging when the bed is filled and ensures alignment stays clean through seasons.

Trellises that Train Vines and Free Ground Space

Vertical support opens pathways, improves airflow, and turns small yards into abundant gardens. Whether arching cattle panels into living tunnels or building graceful A-frames from reclaimed doors, trellises invite beans, peas, cucumbers, and flowers to climb skyward. Plan for wind, anchoring, and harvest access, then choose materials that balance strength and beauty. The right structure can shade a bench, frame a view, and make everyday picking easier, safer, and more joyful for every gardener in the family.

Graceful Arches Using Cattle Panels or Mesh

Bend a cattle panel between anchored T-posts to form a sturdy arch wide enough for comfortable walking. Secure edges with wire or UV-resistant ties, and protect cut ends with caps. Plant cucumbers, runner beans, or morning glories at both bases for a leafy tunnel that cools summer paths. Leave at least three feet between arches for tools. When harvest begins, fruit dangles conveniently at eye level, and the structure becomes a favorite destination for children and pollinators alike.

A-Frames from Doors, Ladders, and Sticks

Repurpose old doors or wooden ladders as A-frame sides, joined by a hinge at the top and a simple chain to prevent over-spreading. Add mesh or string for climbing plants, then fold the assembly flat for winter storage. Strong sticks tied with natural fiber twine can form elegant, lightweight versions. Peas love the gentle slope, and summer vining flowers cast dappled shade on herbs below. A-frames are approachable projects that require minimal cutting and provide generous vertical growing space.

Supports for Tomatoes, Cucumbers, and Climbing Flowers

Train tomatoes with a Florida weave by stringing twine between conduit or reclaimed posts, tightening lines as plants grow. For cucumbers, attach netting to a staunch frame so fruits hang straight and easy to spot. Add crossbars where heavy clusters form, and keep pruning shears handy to guide airflow. Morning glories, black-eyed Susan vines, and scarlet runner beans add color and pollinator interest, turning practical supports into living sculptures that nourish your kitchen and delight your guests.

Soil, Water, and Maintenance for Long-Lasting Abundance

Healthy soil and smart watering turn reclaimed structures into thriving ecosystems. Focus on balanced blends, consistent moisture, and gentle amendments that build fertility over time. Consider drip irrigation routed along frames to reduce evaporation and keep foliage dry. Inspect fasteners, joints, and finishes seasonally so everything remains safe and stable. With small, regular care, your beds and trellises will weather storms, support heavy crops, and continue delivering flavor, fragrance, and beauty year after rewarding year.

Stories, Community, and Your Next Proud Build

Gardening with reclaimed materials is a conversation with neighbors, past builders, and future harvests. Share photos, swap tips, and celebrate experiments that worked—or taught important lessons. Your voice helps others reduce waste, save money, and grow confidence. We welcome your questions, success stories, and creative twists. Subscribe for fresh plans and seasonal guides, and join readers trading materials responsibly. Together we learn faster, waste less, and create gardens that feel alive with ingenuity and shared care.

Showcase Your Creation and Inspire Others

Send pictures, dimensions, and a short materials list so fellow makers can replicate or remix your approach. Include the costs you avoided by reusing, any repairs you made, and how the structure performed through weather and harvest. Before-and-after shots help beginners visualize transformation. Tell us what you would change next time, or which detail sparked compliments. Your experience lights the path for the next gardener who just discovered a promising stack of boards by a friendly neighbor’s curb.

Ask Questions, Swap Materials, Share Fixes

Use the comments to troubleshoot tricky joints, evaluate mysterious coatings, or brainstorm safer alternatives when a piece seems questionable. Offer extra boards, panels, or bricks to local readers, and request sizes you need for your next build. Share quick fixes for wobbly corners or stretched netting. Friendly exchanges save landfill space and money while turning strangers into collaborators. When we pool knowledge and materials, reclaimed projects become easier, safer, and far more fun for everyone involved.
Kimazerutupivexe
Privacy Overview

This website uses cookies so that we can provide you with the best user experience possible. Cookie information is stored in your browser and performs functions such as recognising you when you return to our website and helping our team to understand which sections of the website you find most interesting and useful.